Hi Everyone,
Yet another sub build, with a nice twist at the end! Some time ago I gave my nephew ( [member=18550]El Sid[/member] 's son ) a 5.1 set of TLS ?Reference? (yup, note the quotes) speakers as they weren?t being used any more. It came with a 10? sub in a small enclosure that made some noise, but certainly wasn?t much to write home about. El-Sid told me that during one of my nephew?s parties, one of my nephew's ?mates? decided it would be a good idea to kick in the driver of the sub, obviously destroying it in the process.
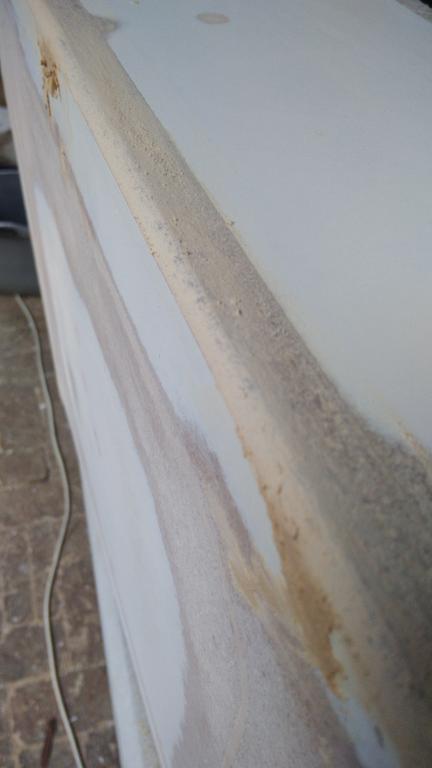
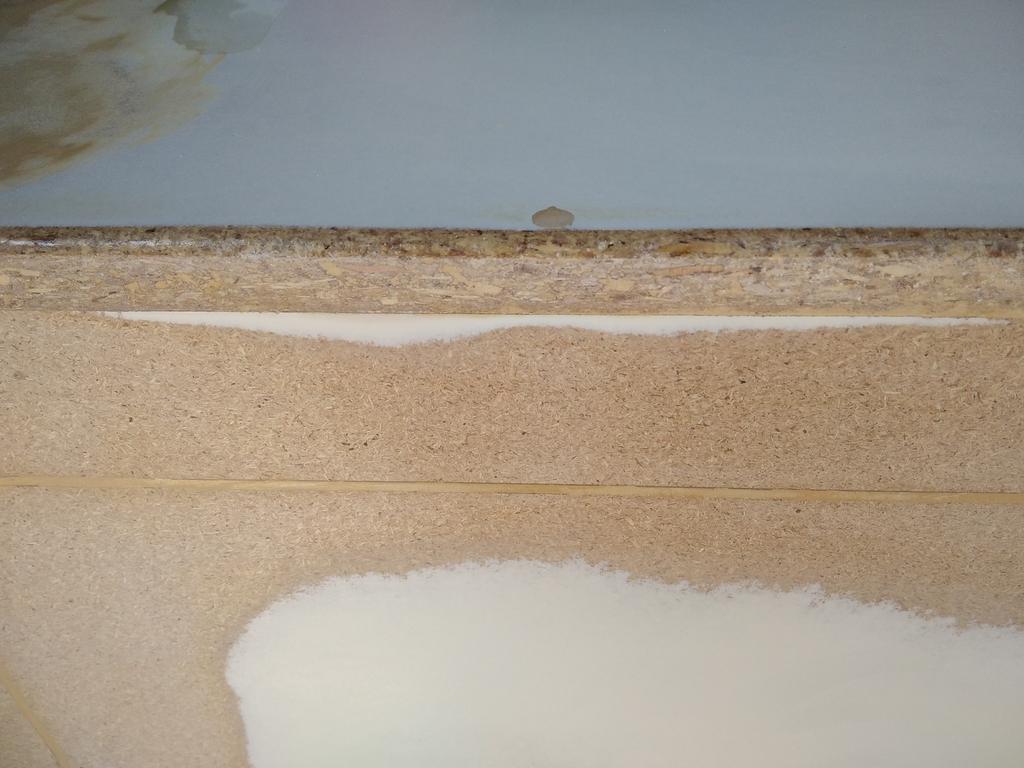
My nephew?s birthday was coming up soon, so I decided to build him a new sub as I had a couple of old 12? drivers in storage and some chipboard cupboards that were ripped out due to water damage. I had no T/S parameters for the drivers as they are nowhere to be found, but I wasn?t trying to beat SVS in sub design with this one, it was just to replace the trashed sub with something that would hopefully perform a bit better. I was at least able to scavenge the plate amp from the old sub, it?s nothing major, puts out about 150W, but it was sufficient for this build.
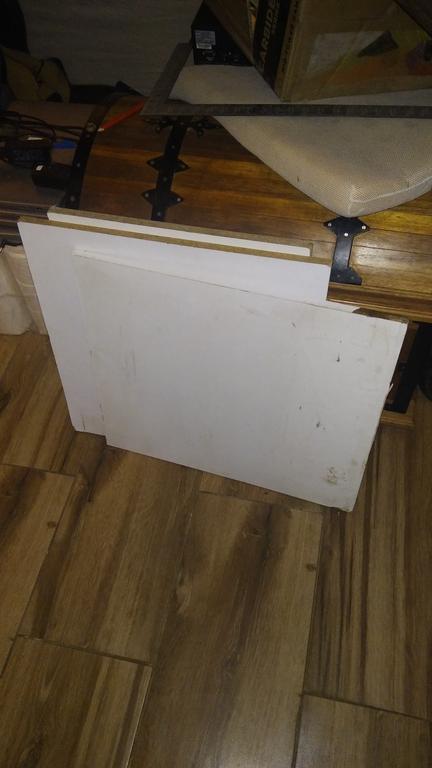
These are the panels that I cut out for the box, I already had the baffle from another test build.
Start of the build, once you have a basic 4 sided box done, the rest is much easier.
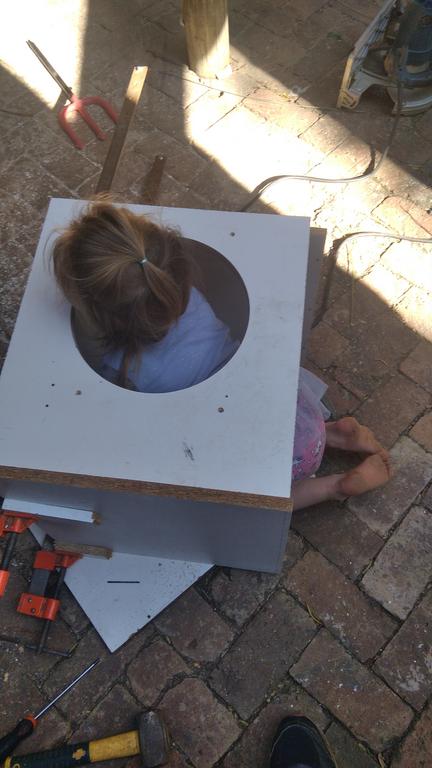
Whilst testing the baffle for fit, my 3yr old daughter approached and was very intrigued with the box, she asked: House daddy? House?
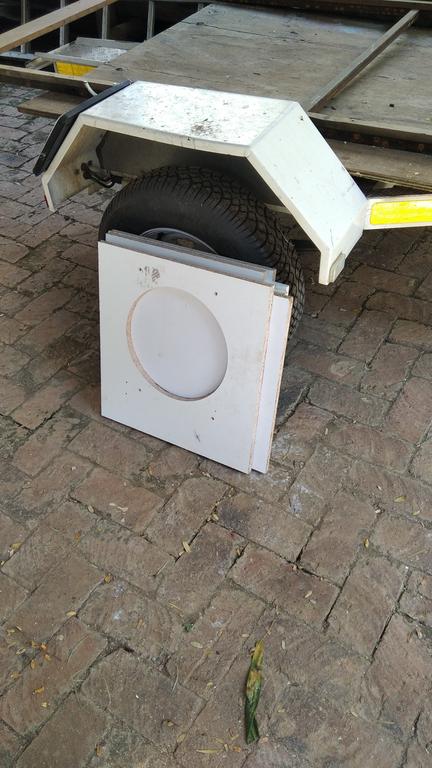
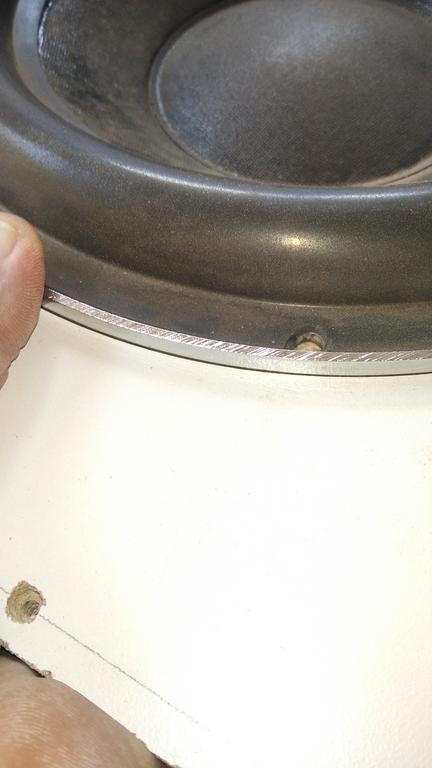
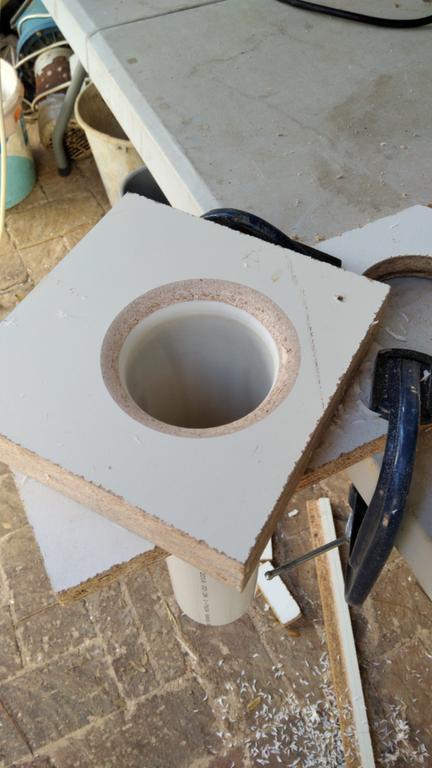
Measuring the diameter of the driver to cut a recess with the router so that the driver fits nice and flush.
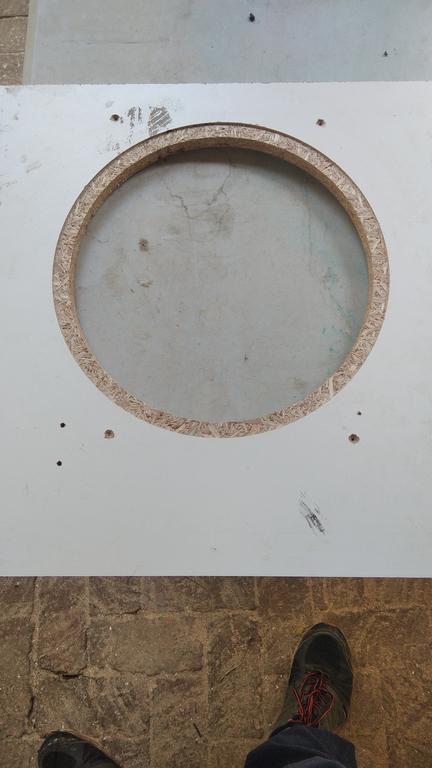
Recess cut.
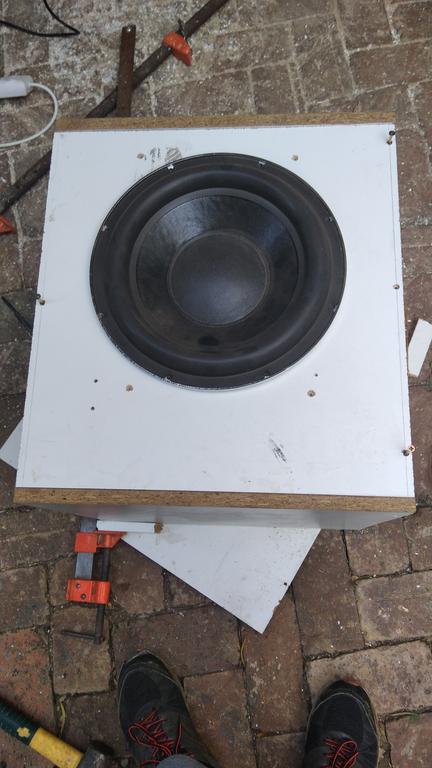
Check for fit, like a gluuuuuurve!
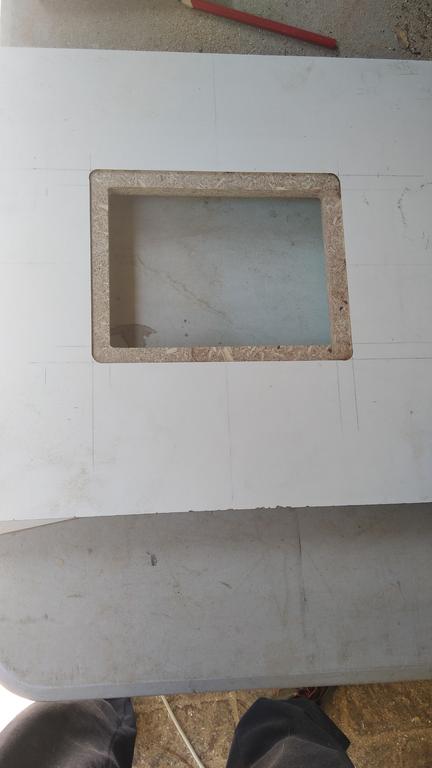
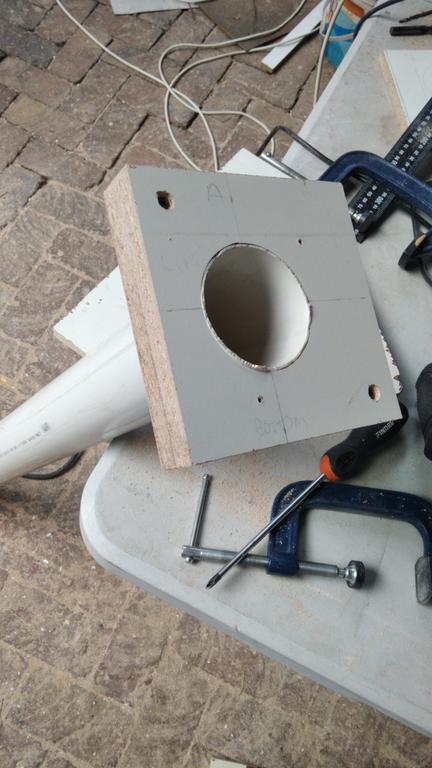
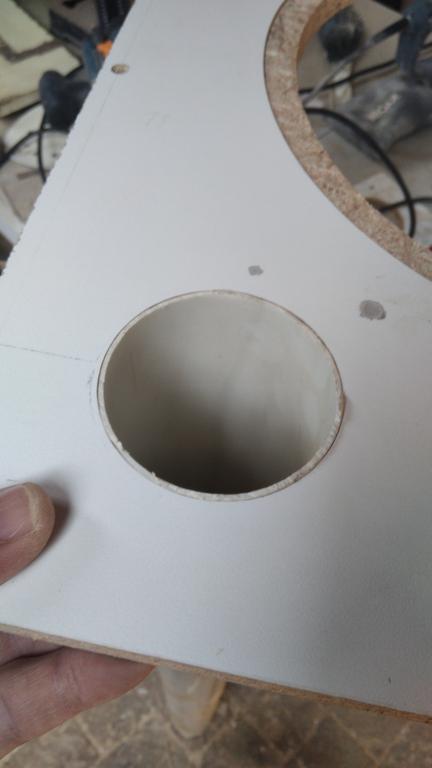
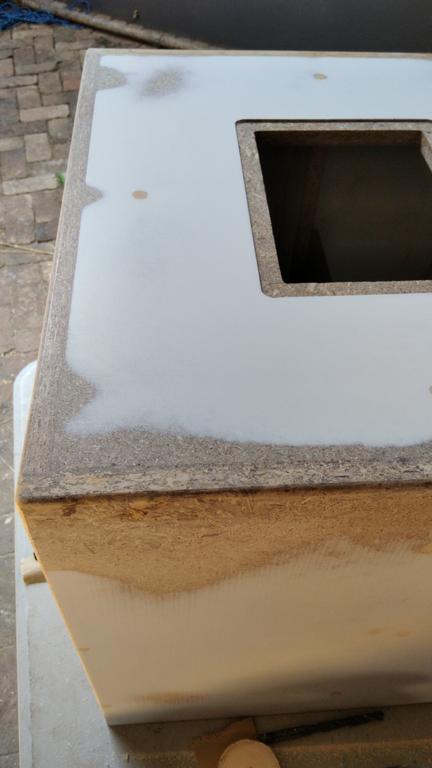
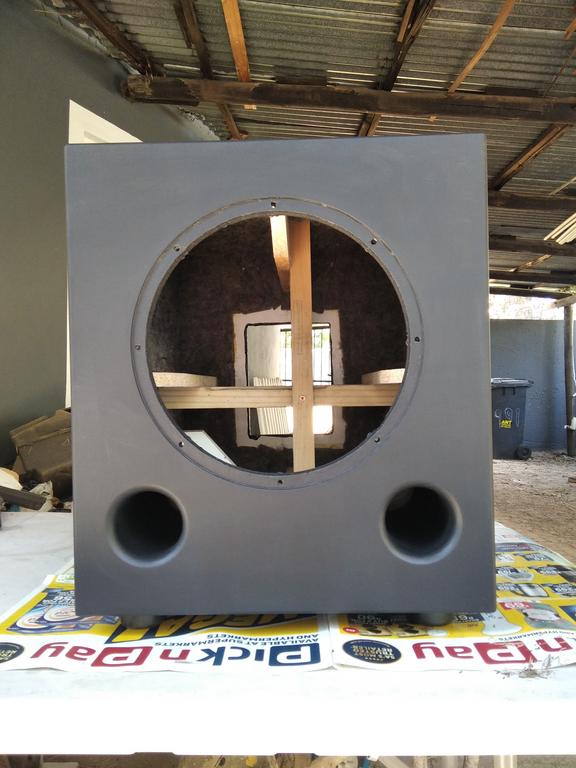
Cut the hole and recess for the plate amp with the router.
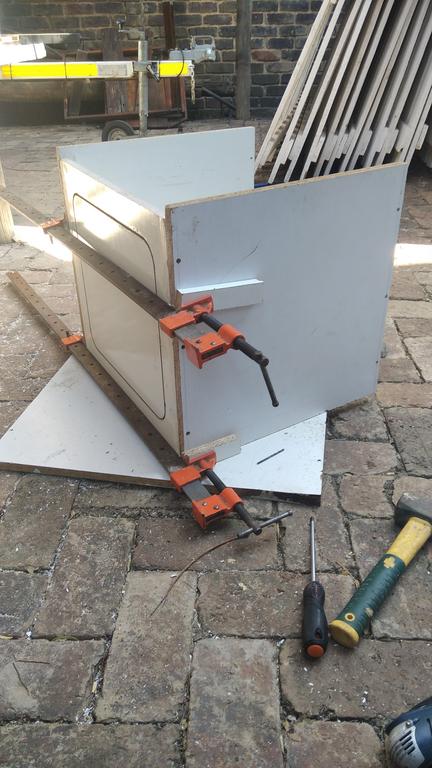
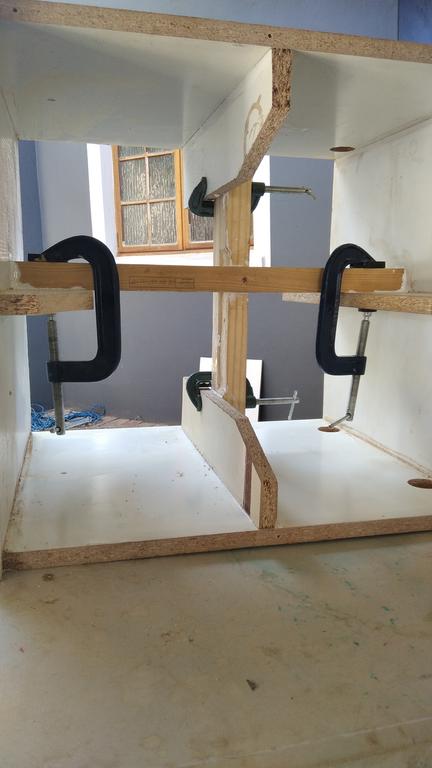
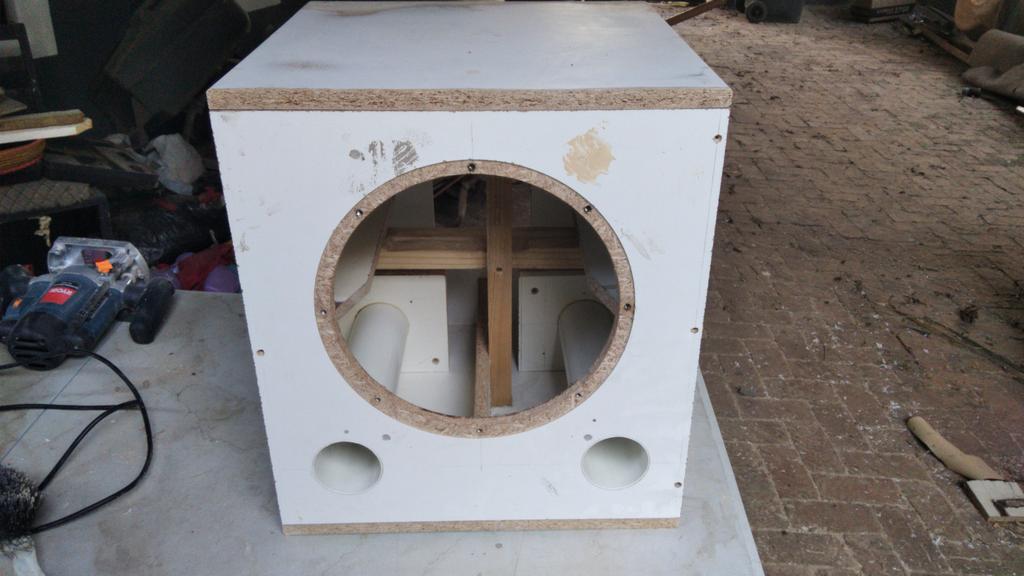
Cut and glued ?n screwed in the bracing panels.
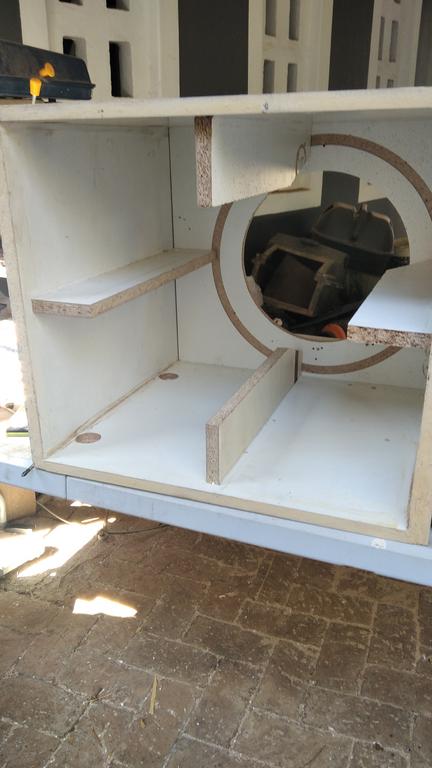
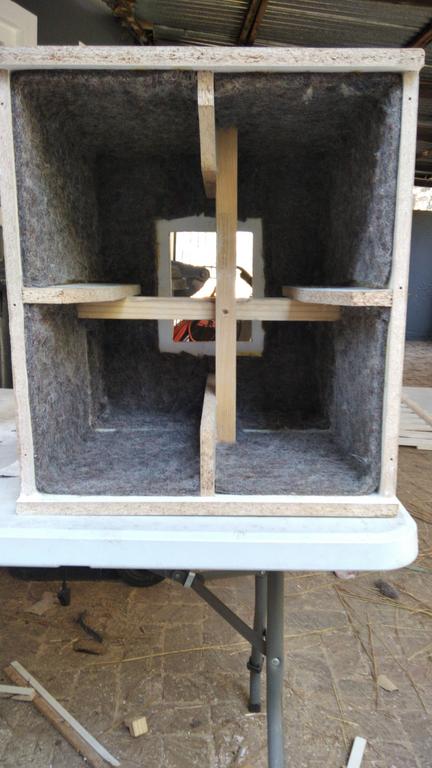
Installed the cross bracing.
Screwed and glued the rear panel in place.
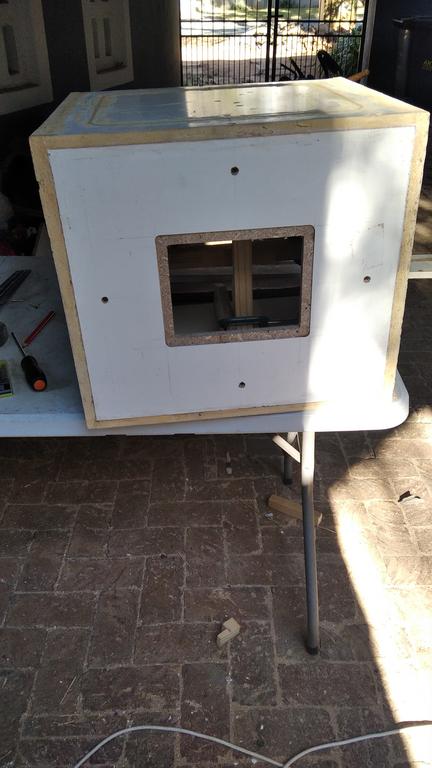
Started the graft work, filling and sanding, filling and sanding..
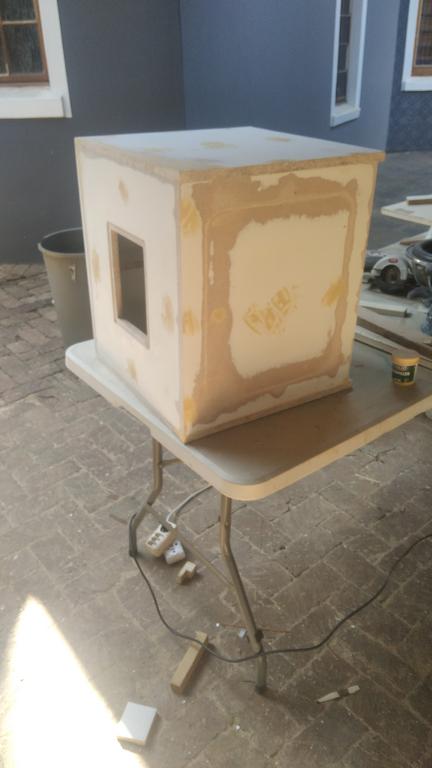
Trimmed the edges with a roundover bit and filled the edges with wood filler to fill in the large holes.
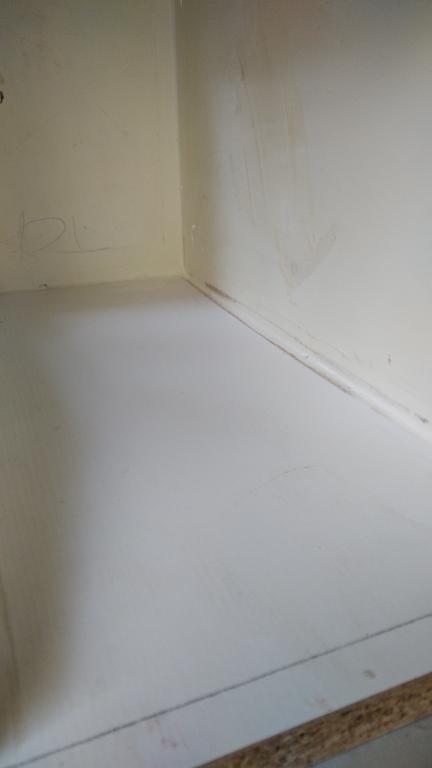
Once the woodfiller was sanded down, I applied sanding sealer on all the edges and exposed chipboard and then sanded and sealed, sanded and sealed. This sanding sealer really is the bomb, it?s one of those eureka moments, you can?t believe you tried projects without it, much like using a router for the first time. Thanks again to [member=13623]fredeb[/member] for the suggestion in this thread: https://www.avforums.co.za/index.php/topic,88735.0.html
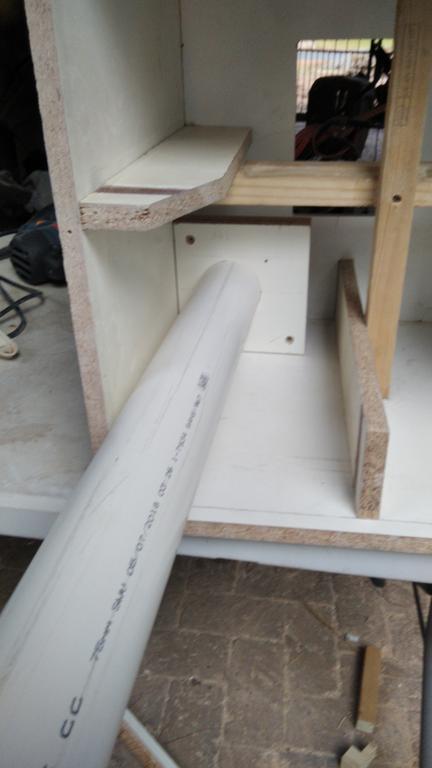
Time to build the reflex ports, I cut out two blocks of chipboard and glued them together. This is to mount the port inside of the cabinet, cut a 75mm diameter hole for the PVC pipe with the router. Checked for fit, had a nice tight fit so was really happy with the result. Glued the pipe into place so that it wouldn?t move. Did the same for the second port.
Measured for length and cut the PVC pipe.
Used the largest roundover bit I had to cut a flare for the port. Used woodfiller and sanding sealer to make sure the cut was nice and smooth, sanded it down with 200 grit paper for a super smooth finish.
Did the same to the second port.
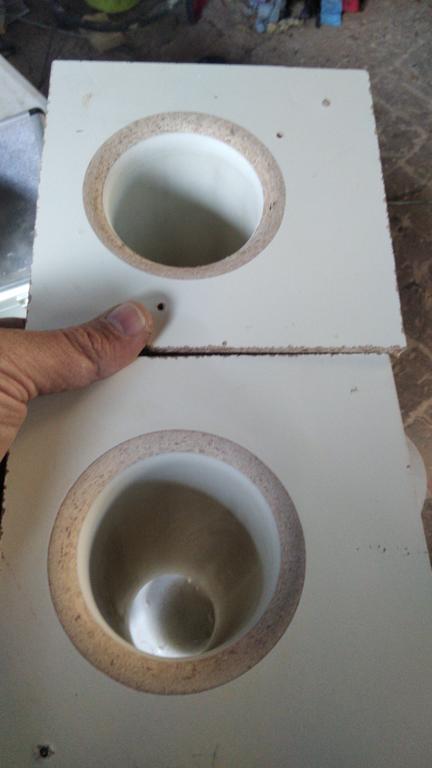
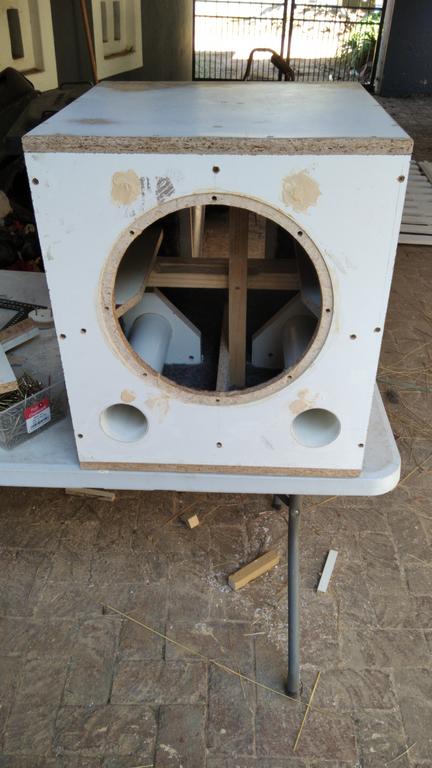
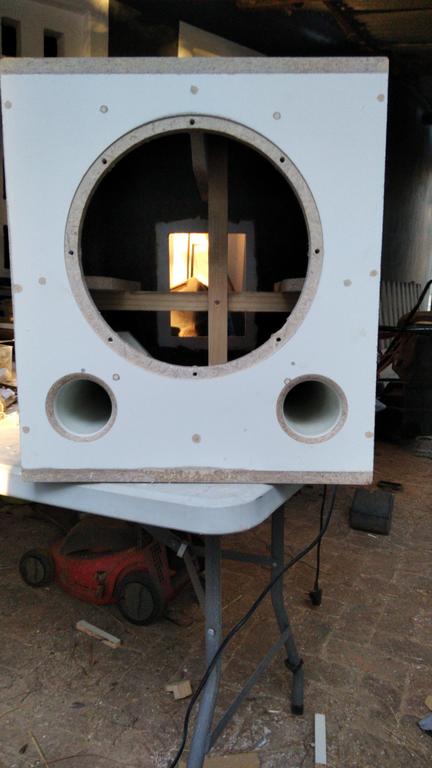
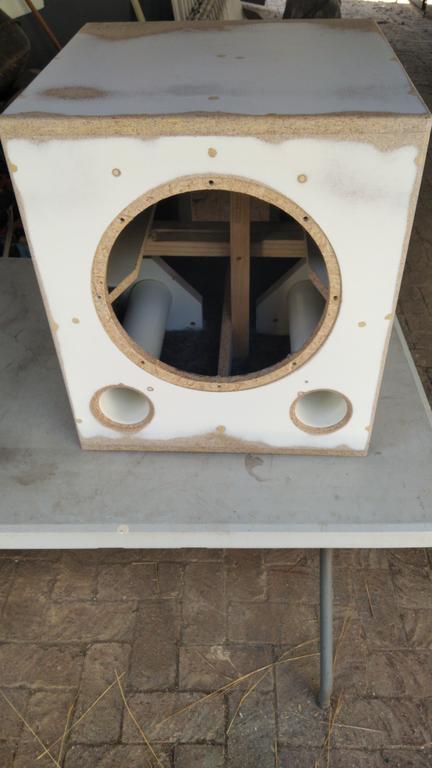
Cut 75mm holes in the baffle for the PVC pipe.
Checked for fit and position.

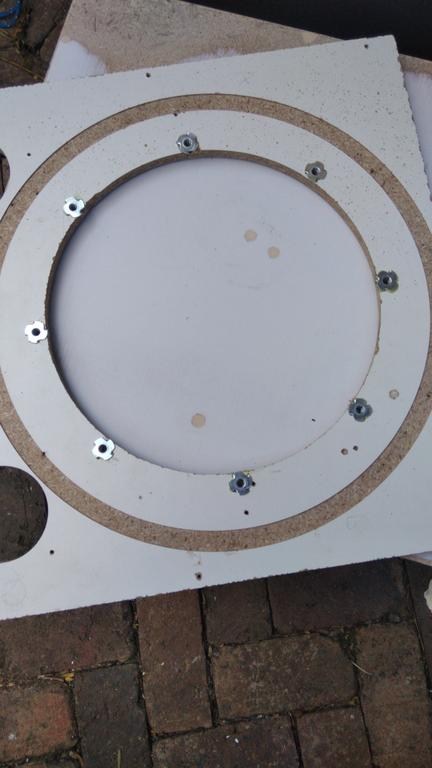
Realised I hadn?t put the T-nuts in place for the driver, drilled the required holes and glued them into place. You can see the cut I made from a previous project for a 15? driver.
Test fit of the baffle with both ports in place.
Sealed all inside corners and edges with contractor?s acrylic.
More sanding and sealing, trying to get as smooth a finish as possible.
Lined the interior with dog blanket.
Fixed the baffle in place, I cut some of the wood off the blocks that were holding the PVC pipe in place, was taking up unnecessary volume. Glued the PVC pipes in place in the baffle to make sure they were airtight.
Flared the ports in front using the same large roundover bit I used for the rear of the ports. Used woodfiller and sanding sealer to make sure the flares were smooth. Used the same 200 grit sandpaper to make sure they were super smooth.
Rounded off the edges of the baffle with the router, did a final sealing and sanding of the entire box, ready for paint.
First coat of paint.
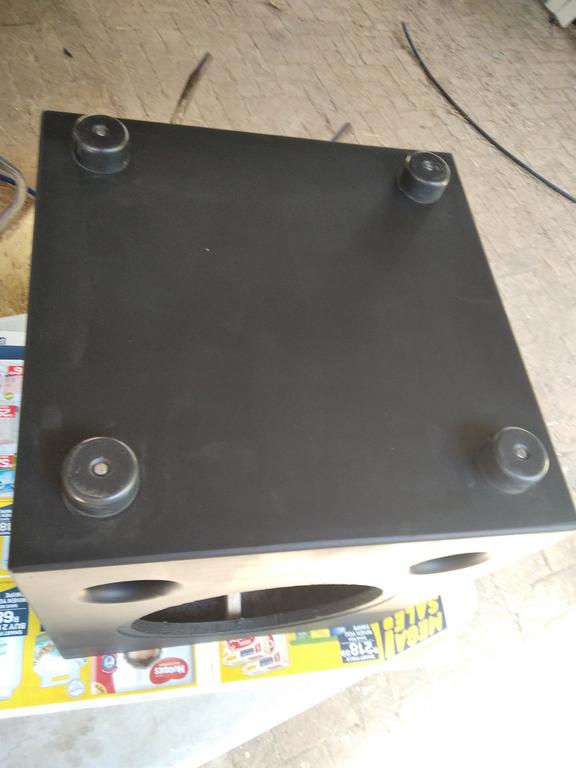
Once the final coat of paint was on and dried, I put the feet in place.
Ready for the driver and plate amp.
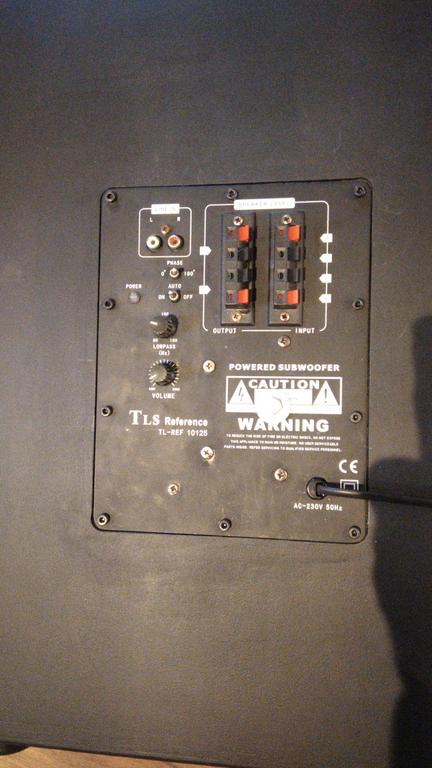
Pics of the plate amp. Ages ago when I used the TLS Reference sub, the original iron core transformer burnt out and I replaced it with two 100VA toroidal transformers. They?re stacked on top of each other so that?s why there?s a large bolt straight through the ?Caution? sign.
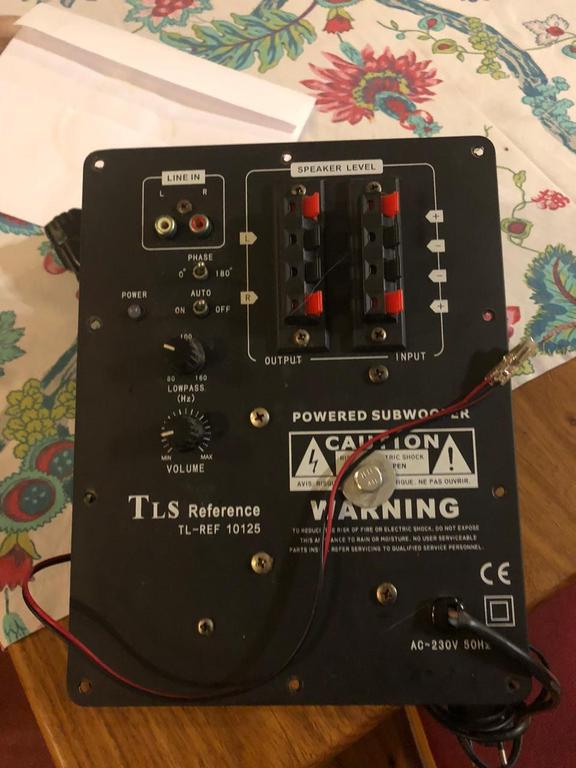
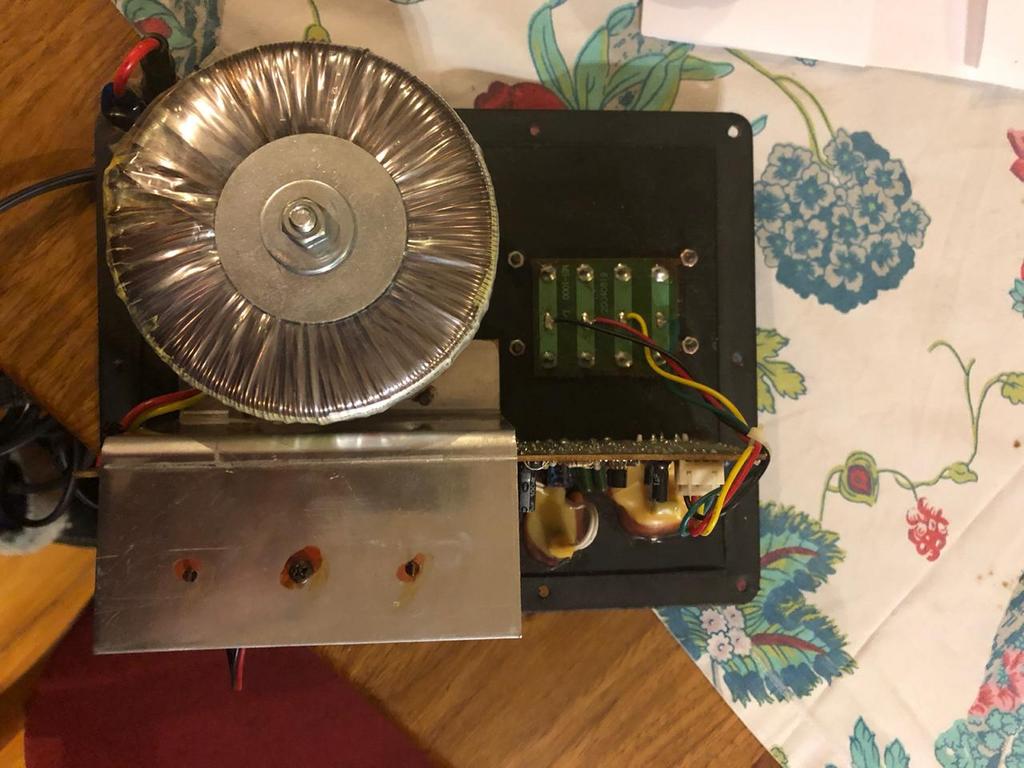
Plate amp mounted in place with hex screws.
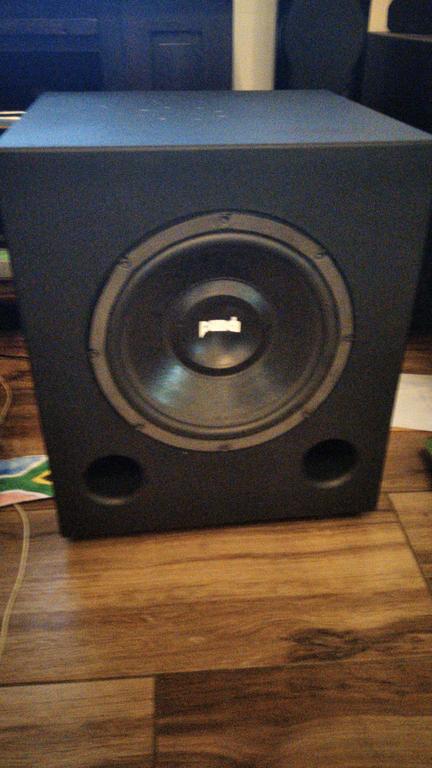
Driver mounted in place, this driver was in storage, I only went to fetch it just before the paint was dry, that?s why there?s a different driver in the earlier pic. Sorry for the crappy quality pic, only realised much later.
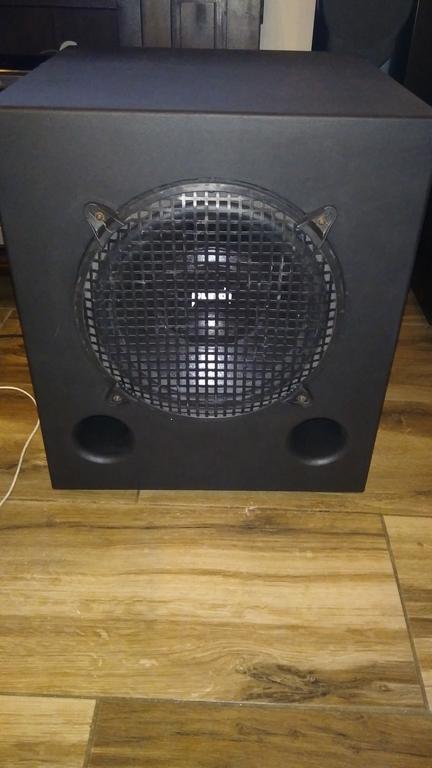
And finally, to make sure no one kicks the driver in during the next party, I mounted a grill over the driver to protect it.
Now for the cherry on top! My wife suggested that it should look more funky and thought that it should have some graffiti or other such art work on it. I spoke to El-Sid about it and he thought it was a great idea. So I decided to call on some more family members and spoke to [member=22015]Nchebe[/member] and asked if his sons, one of them being @Beastie1311 would be interested in doing some graffiti on the box as they had studied 3D graphics and fine art at varsity. They were super excited to do it and got cracking on a design.
This is what they came up with, a Dark Side of the Moon logo with their personal touch. They used stencilling and graffiti spray paint to do it.
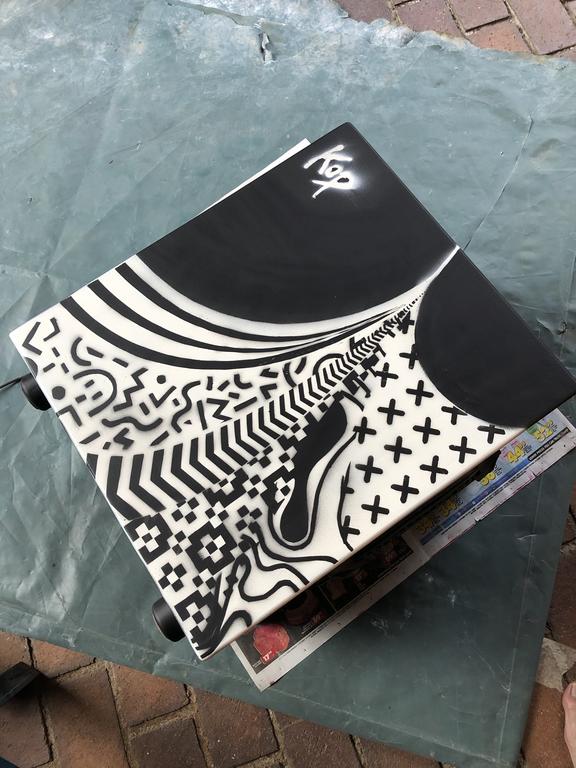

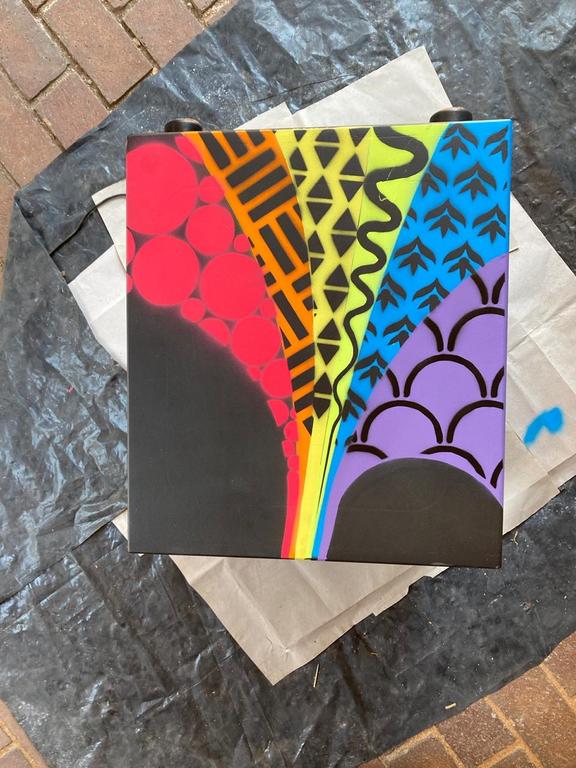
This is the final result:
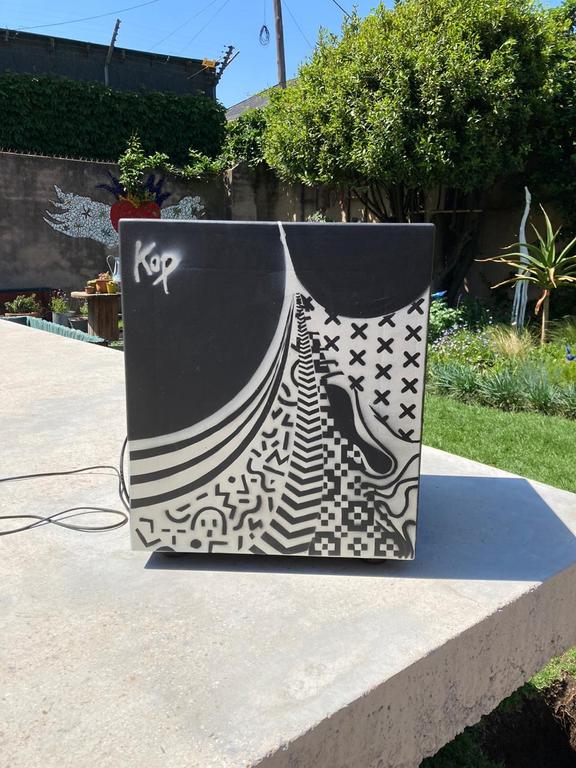

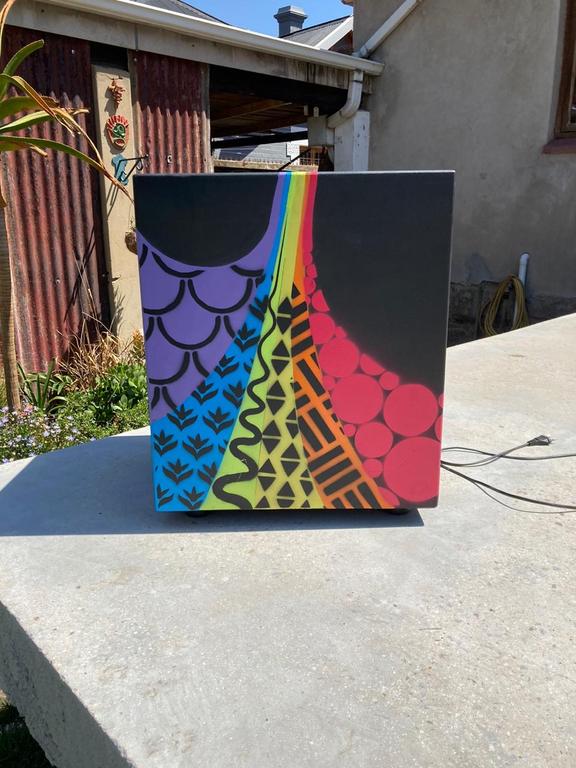


I was gobsmacked when I saw it in person, it looked spectacular! Brilliant job by Beastie1311 and his brother. We had a get together for my nephew for his birthday and gave him the sub as a present from all of us. He was super stoked, beaming from ear to ear! All the work that went into it was well worth it when we saw his reaction. Sure, it?s not the most powerful or best sounding sub out there, but it?s definitely a huge leap over the TLS Reference sub he had before and with the personal touch from his cousins, it should keep him happy for some time to come.
Yet another sub build, with a nice twist at the end! Some time ago I gave my nephew ( [member=18550]El Sid[/member] 's son ) a 5.1 set of TLS ?Reference? (yup, note the quotes) speakers as they weren?t being used any more. It came with a 10? sub in a small enclosure that made some noise, but certainly wasn?t much to write home about. El-Sid told me that during one of my nephew?s parties, one of my nephew's ?mates? decided it would be a good idea to kick in the driver of the sub, obviously destroying it in the process.
My nephew?s birthday was coming up soon, so I decided to build him a new sub as I had a couple of old 12? drivers in storage and some chipboard cupboards that were ripped out due to water damage. I had no T/S parameters for the drivers as they are nowhere to be found, but I wasn?t trying to beat SVS in sub design with this one, it was just to replace the trashed sub with something that would hopefully perform a bit better. I was at least able to scavenge the plate amp from the old sub, it?s nothing major, puts out about 150W, but it was sufficient for this build.
These are the panels that I cut out for the box, I already had the baffle from another test build.
Start of the build, once you have a basic 4 sided box done, the rest is much easier.
Whilst testing the baffle for fit, my 3yr old daughter approached and was very intrigued with the box, she asked: House daddy? House?
Measuring the diameter of the driver to cut a recess with the router so that the driver fits nice and flush.
Recess cut.
Check for fit, like a gluuuuuurve!
Cut the hole and recess for the plate amp with the router.
Cut and glued ?n screwed in the bracing panels.
Installed the cross bracing.
Screwed and glued the rear panel in place.
Started the graft work, filling and sanding, filling and sanding..
Trimmed the edges with a roundover bit and filled the edges with wood filler to fill in the large holes.
Once the woodfiller was sanded down, I applied sanding sealer on all the edges and exposed chipboard and then sanded and sealed, sanded and sealed. This sanding sealer really is the bomb, it?s one of those eureka moments, you can?t believe you tried projects without it, much like using a router for the first time. Thanks again to [member=13623]fredeb[/member] for the suggestion in this thread: https://www.avforums.co.za/index.php/topic,88735.0.html
Time to build the reflex ports, I cut out two blocks of chipboard and glued them together. This is to mount the port inside of the cabinet, cut a 75mm diameter hole for the PVC pipe with the router. Checked for fit, had a nice tight fit so was really happy with the result. Glued the pipe into place so that it wouldn?t move. Did the same for the second port.
Measured for length and cut the PVC pipe.
Used the largest roundover bit I had to cut a flare for the port. Used woodfiller and sanding sealer to make sure the cut was nice and smooth, sanded it down with 200 grit paper for a super smooth finish.
Did the same to the second port.
Cut 75mm holes in the baffle for the PVC pipe.
Checked for fit and position.
Realised I hadn?t put the T-nuts in place for the driver, drilled the required holes and glued them into place. You can see the cut I made from a previous project for a 15? driver.
Test fit of the baffle with both ports in place.
Sealed all inside corners and edges with contractor?s acrylic.
More sanding and sealing, trying to get as smooth a finish as possible.
Lined the interior with dog blanket.
Fixed the baffle in place, I cut some of the wood off the blocks that were holding the PVC pipe in place, was taking up unnecessary volume. Glued the PVC pipes in place in the baffle to make sure they were airtight.
Flared the ports in front using the same large roundover bit I used for the rear of the ports. Used woodfiller and sanding sealer to make sure the flares were smooth. Used the same 200 grit sandpaper to make sure they were super smooth.
Rounded off the edges of the baffle with the router, did a final sealing and sanding of the entire box, ready for paint.
First coat of paint.
Once the final coat of paint was on and dried, I put the feet in place.
Ready for the driver and plate amp.
Pics of the plate amp. Ages ago when I used the TLS Reference sub, the original iron core transformer burnt out and I replaced it with two 100VA toroidal transformers. They?re stacked on top of each other so that?s why there?s a large bolt straight through the ?Caution? sign.
Plate amp mounted in place with hex screws.
Driver mounted in place, this driver was in storage, I only went to fetch it just before the paint was dry, that?s why there?s a different driver in the earlier pic. Sorry for the crappy quality pic, only realised much later.
And finally, to make sure no one kicks the driver in during the next party, I mounted a grill over the driver to protect it.
Now for the cherry on top! My wife suggested that it should look more funky and thought that it should have some graffiti or other such art work on it. I spoke to El-Sid about it and he thought it was a great idea. So I decided to call on some more family members and spoke to [member=22015]Nchebe[/member] and asked if his sons, one of them being @Beastie1311 would be interested in doing some graffiti on the box as they had studied 3D graphics and fine art at varsity. They were super excited to do it and got cracking on a design.
This is what they came up with, a Dark Side of the Moon logo with their personal touch. They used stencilling and graffiti spray paint to do it.
This is the final result:
I was gobsmacked when I saw it in person, it looked spectacular! Brilliant job by Beastie1311 and his brother. We had a get together for my nephew for his birthday and gave him the sub as a present from all of us. He was super stoked, beaming from ear to ear! All the work that went into it was well worth it when we saw his reaction. Sure, it?s not the most powerful or best sounding sub out there, but it?s definitely a huge leap over the TLS Reference sub he had before and with the personal touch from his cousins, it should keep him happy for some time to come.