So yesterday I decided to build some speaker stands for a pair of Magnat bookshelves.The idea was to use whatever I had around the house to minimize the cost factor. But before we go any further, I'm no woodworking pro so if you spot any blunders, kindly over look them ")
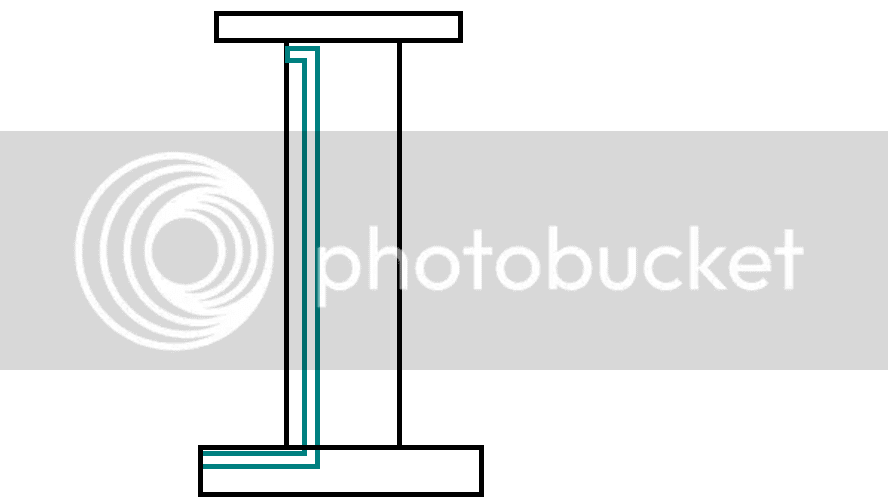
Ideas! Google has quit a bit of them, ranging from metal, to pvc and wood. I chose wood as I rather enjoy working with it and you can get it anywhere. My build is nothing fancy or new, I just like the thick post, heavy base type stand. Something like this. Green lines was to be for cable routing. Might leave out the cable routing option. Center piece to be filled with sand or kitty litter. The later is probably better as it's dry,(you dont want your hard work going all wonky because the sand you put in was damp. The sand or kitty litter will add some weight to the stand. Not sure if it improves the sound but it will surely make it more sturdy. Another item I still need to get or would like to get is a thin rubber sheet. Large enough to fit on the top of the stand and in between the speaker cabinet. Helps stop the cabs from shifting So here is my choice
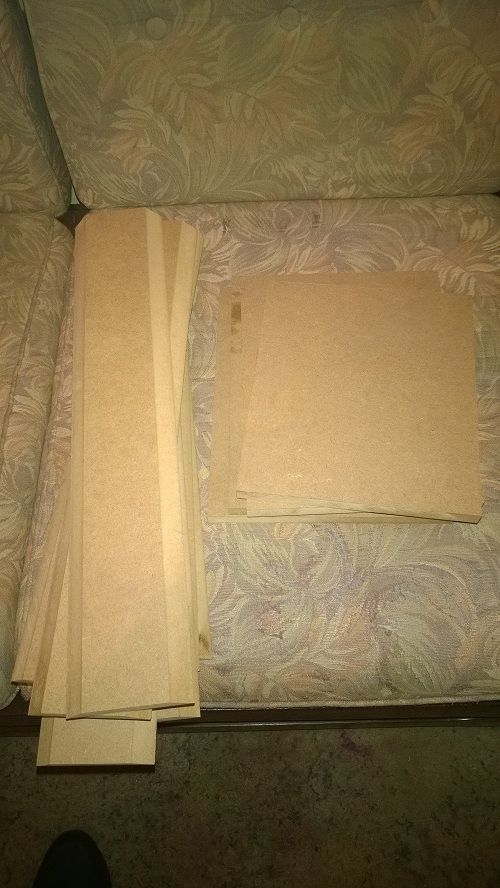
First problem, I had nothing to start with :vsad: But a trip down to the dumpster outside Chipbase in Tokai offered me quite a few very decent pieces for my build. In fact, exactly what I need, and it was free. Only cost involved here was R30 for the cutting.
Even though there is no splinters here, be careful with mdf cut at angles, it's FN sharp and can easily cut you soft baby like skin That's no joke. It might not look so, but believe me it will.
Remember, make sure your wood and area is clean and free of any dust left over from the cutting process. Take a cloth or small hand broom to wipe down the wood.
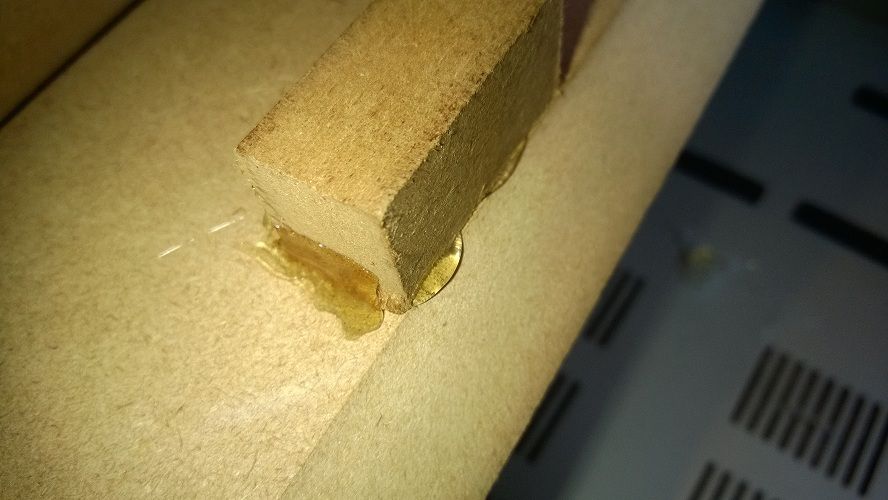
Second problem, I dont own clamps, but a forum member suggested I use tape. I chose masking tape as I had a broad role of it. To overcome the moving of the pieces of wood while working with it, I used small pieces of mdf and glued it just shy of the 45 deg edges of the wood using hot glue. This also aids in lining everything up.
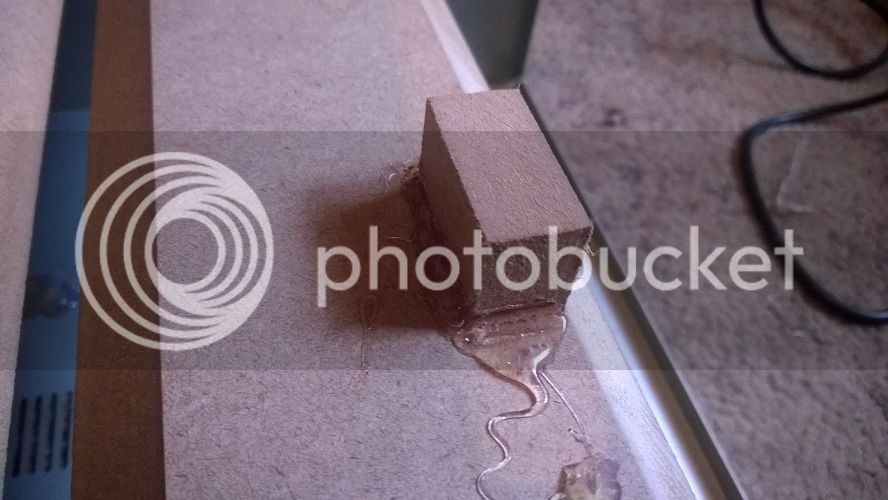
Just remember to remove any excess glue from the blocks, as it will cause your remaining pieces not to line up.
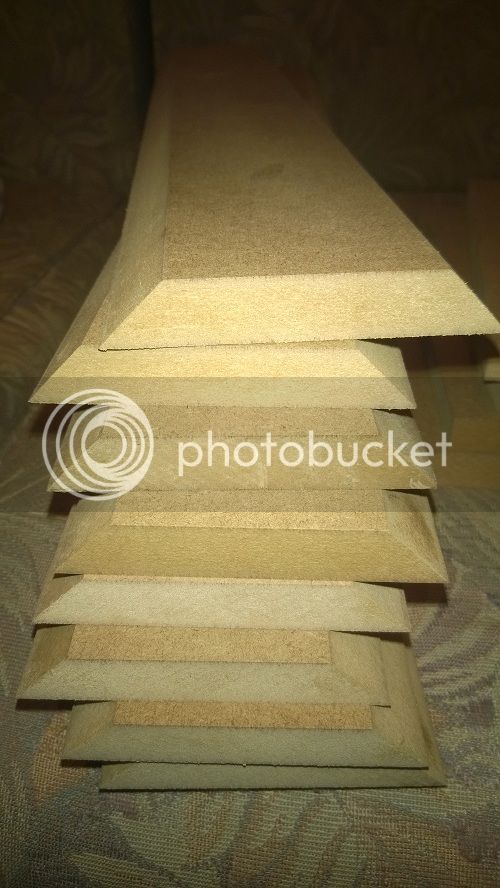
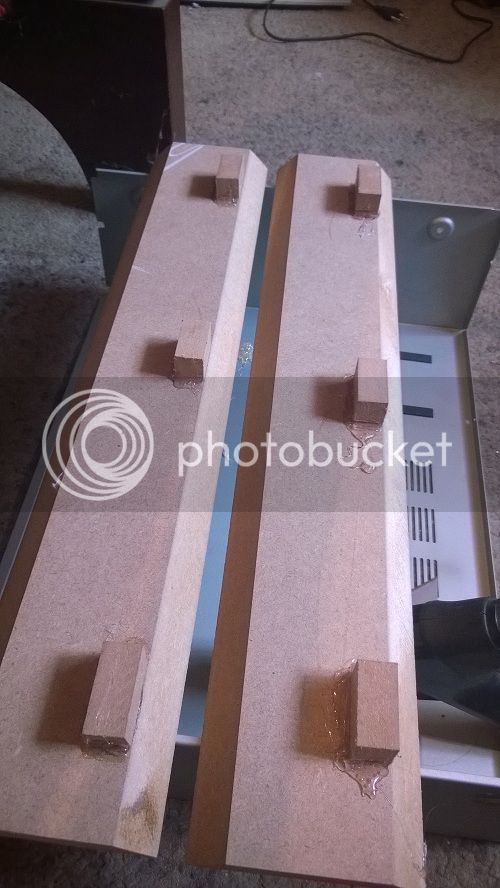
This is what it looked like, I have four strips like this per stand.
Next I applied wood glue (don't be shy here) along the 45 deg edges and stuck it onto the corresponding piece. Don't worry about glue leaking out, a damp cloth will get rid of it. While holding it all in place, I used hot glue around the small blocks, just to prevent them from shifting. In fact, I ran glue all along the inside of the joints. I got lekka doing that
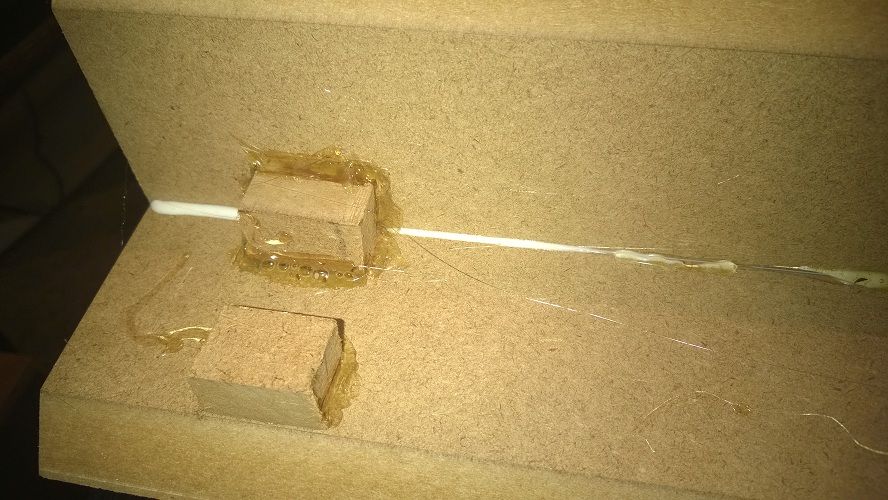
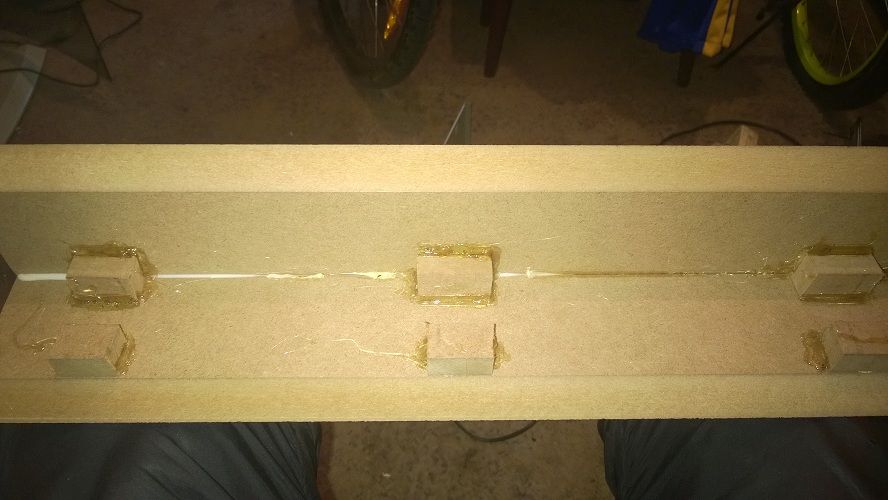
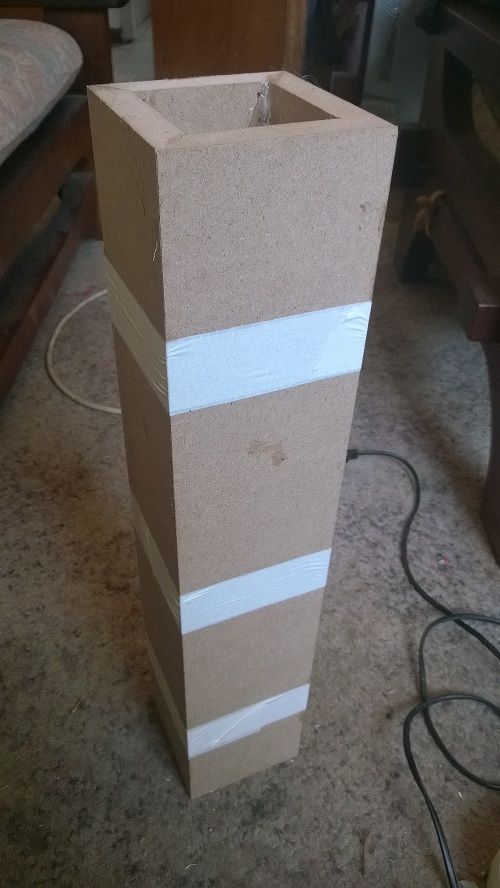
So once you 4 pieces are stuck together, it should look something like this. See the masking tape, used to hopefully keep everything in place while the glue sets :facepalm:
What I will be adding to the bottom of my base is the strip lying to the right side. That will be cut into lengths and that will then be glued in place. That should give me a slightly thicker looking base and increase the height of the stand as well. It will also give you more than enough scope/space should you want to do the cable routing from the bottom up, fit binding posts or something like that to the base of your stand This is kinda the stand I wanted
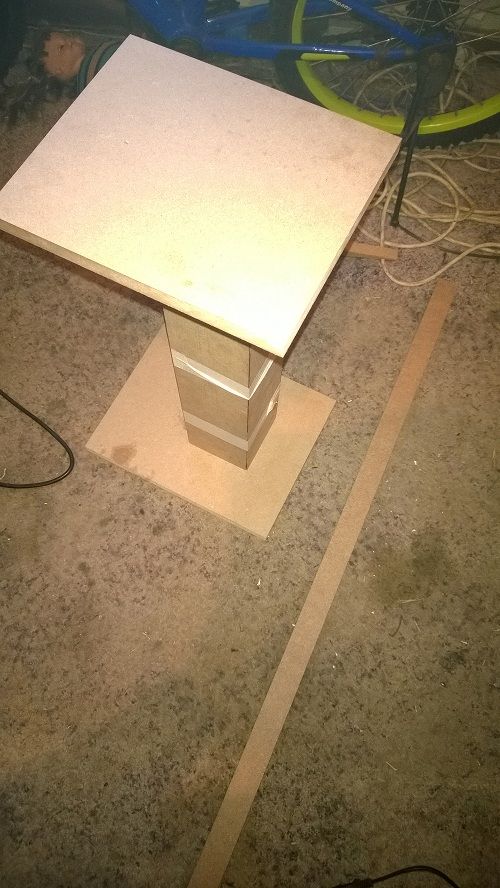
Once this sets, mine ain't yet, it's just a matter of marking out the base plate and positioning the square tube you just assembled. I would like mine to be slightly towards the front. That will lesson the chance of your base buckling over time. For those guys with the heavy cabs.
Once mine is done, I will be drilling 4 holes through the base and into the tube, and putting in some wood screws just for extra support. Be careful when screwing the screws into the tube you just made. To tight and it will split, so it's a good idea to glue it in place first. Once the glue is set, the screw can then be screwed in, with caution.
I will update with more pictures and what it looks like tomorrow. Hopefully it doesn't fall apart :BWAHAHAH: :BWAHAHAH:
Ideas! Google has quit a bit of them, ranging from metal, to pvc and wood. I chose wood as I rather enjoy working with it and you can get it anywhere. My build is nothing fancy or new, I just like the thick post, heavy base type stand. Something like this. Green lines was to be for cable routing. Might leave out the cable routing option. Center piece to be filled with sand or kitty litter. The later is probably better as it's dry,(you dont want your hard work going all wonky because the sand you put in was damp. The sand or kitty litter will add some weight to the stand. Not sure if it improves the sound but it will surely make it more sturdy. Another item I still need to get or would like to get is a thin rubber sheet. Large enough to fit on the top of the stand and in between the speaker cabinet. Helps stop the cabs from shifting
So here is my choice
First problem, I had nothing to start with :vsad: But a trip down to the dumpster outside Chipbase in Tokai offered me quite a few very decent pieces for my build. In fact, exactly what I need, and it was free. Only cost involved here was R30 for the cutting.
Even though there is no splinters here, be careful with mdf cut at angles, it's FN sharp and can easily cut you soft baby like skin
That's no joke. It might not look so, but believe me it will.
Remember, make sure your wood and area is clean and free of any dust left over from the cutting process. Take a cloth or small hand broom to wipe down the wood.
Second problem, I dont own clamps, but a forum member suggested I use tape. I chose masking tape as I had a broad role of it. To overcome the moving of the pieces of wood while working with it, I used small pieces of mdf and glued it just shy of the 45 deg edges of the wood using hot glue. This also aids in lining everything up.
Just remember to remove any excess glue from the blocks, as it will cause your remaining pieces not to line up.
This is what it looked like, I have four strips like this per stand.
Next I applied wood glue (don't be shy here) along the 45 deg edges and stuck it onto the corresponding piece. Don't worry about glue leaking out, a damp cloth will get rid of it. While holding it all in place, I used hot glue around the small blocks, just to prevent them from shifting. In fact, I ran glue all along the inside of the joints. I got lekka doing that
So once you 4 pieces are stuck together, it should look something like this. See the masking tape, used to hopefully keep everything in place while the glue sets :facepalm:
What I will be adding to the bottom of my base is the strip lying to the right side. That will be cut into lengths and that will then be glued in place. That should give me a slightly thicker looking base and increase the height of the stand as well. It will also give you more than enough scope/space should you want to do the cable routing from the bottom up, fit binding posts or something like that to the base of your stand This is kinda the stand I wanted
Once this sets, mine ain't yet, it's just a matter of marking out the base plate and positioning the square tube you just assembled. I would like mine to be slightly towards the front. That will lesson the chance of your base buckling over time. For those guys with the heavy cabs.
Once mine is done, I will be drilling 4 holes through the base and into the tube, and putting in some wood screws just for extra support. Be careful when screwing the screws into the tube you just made. To tight and it will split, so it's a good idea to glue it in place first. Once the glue is set, the screw can then be screwed in, with caution.
I will update with more pictures and what it looks like tomorrow. Hopefully it doesn't fall apart :BWAHAHAH: :BWAHAHAH: