In the threads of the other two projects I have been working during December I might have alluded to the fact that I am also building a center channel speaker. I thought it was unfair (to the speaker) to mention it matter of factly in the other threads so I decided to create its very own ")
The design is based on the Seas CA15RLY (H1216) 5" mid bass driver (x2) partnered with the 27TDFC tweeter. I am using the same tweeter in the fronts and surrounds and the CA15RLY should match the CA11RCY (H149) I am using in the fronts nicely - I hope! I am using a MTM configuration. Here are the specifics:
Box volume: 20l
Tuning: 48Hz
Port dia. 50.8mm (2") length 94.69mm
The box is a run of the mill 16mm MDF (supawood) affair with a 32mm thick baffle. The interesting part of the box - as with the other projects - is the real wood (American walnut) side panels that will be glued to the box. The rest of the box will be covered in black vinyl.
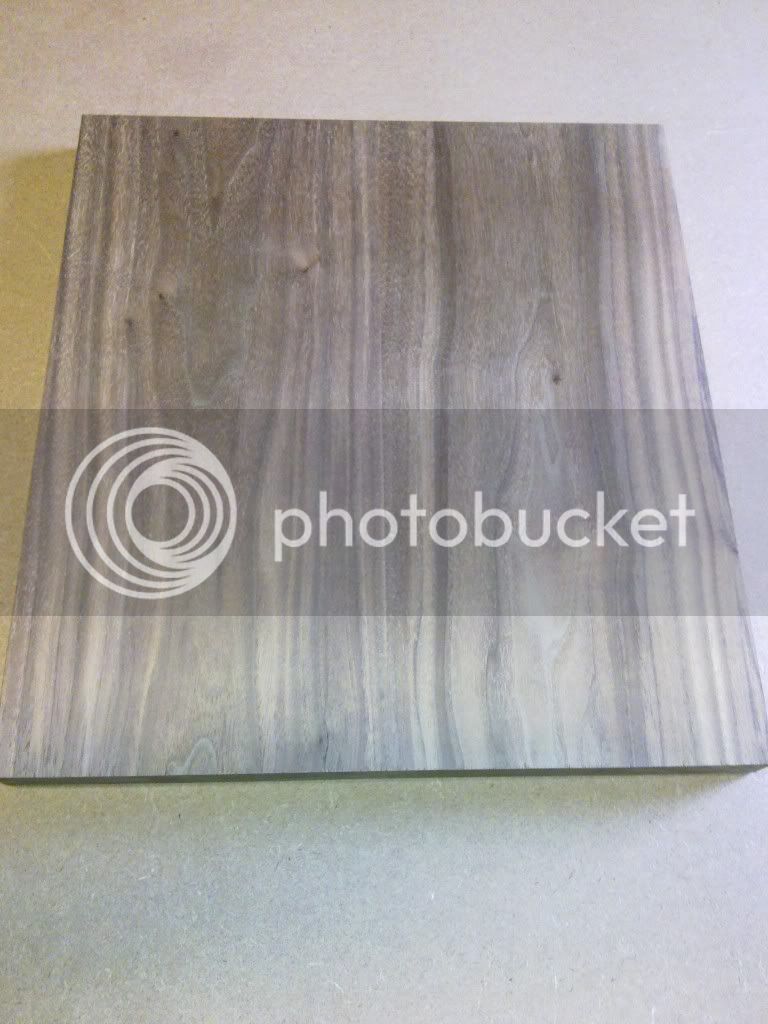
I have glued to 200mm x 500mm x 38mm (W x H x D) wide planks together and sanded the surface down with my drum sander till it was flat. I then gave it a sand with an 80 grit disc on the orbital sander and then with a 240 grit disc. This is the result.
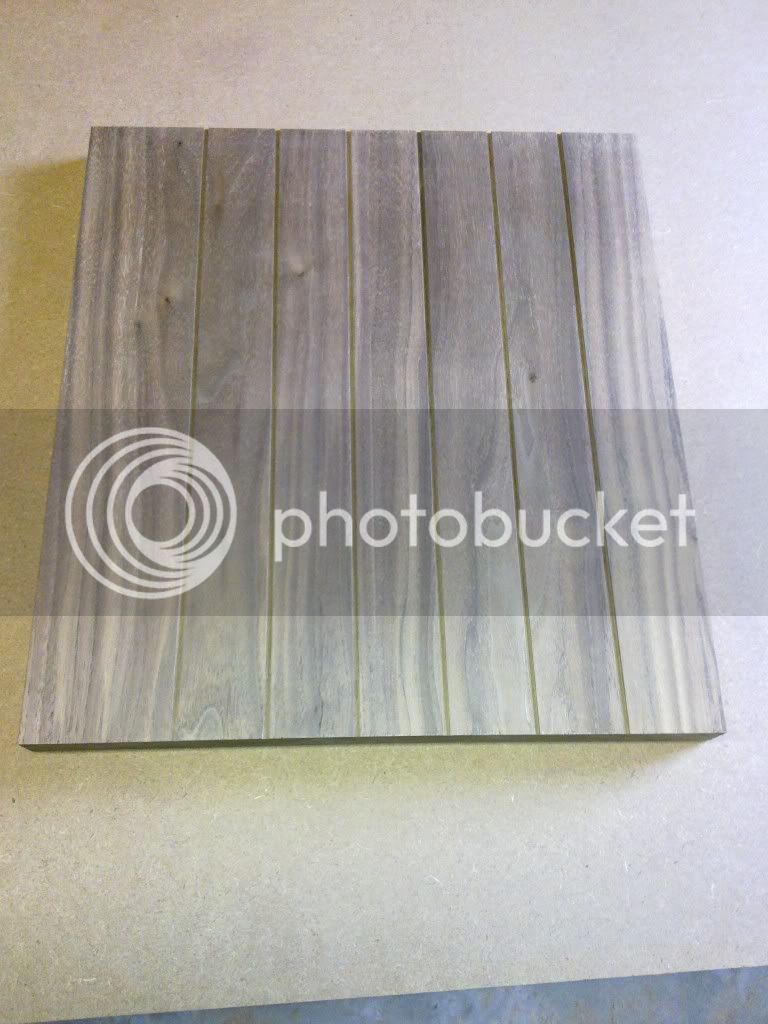
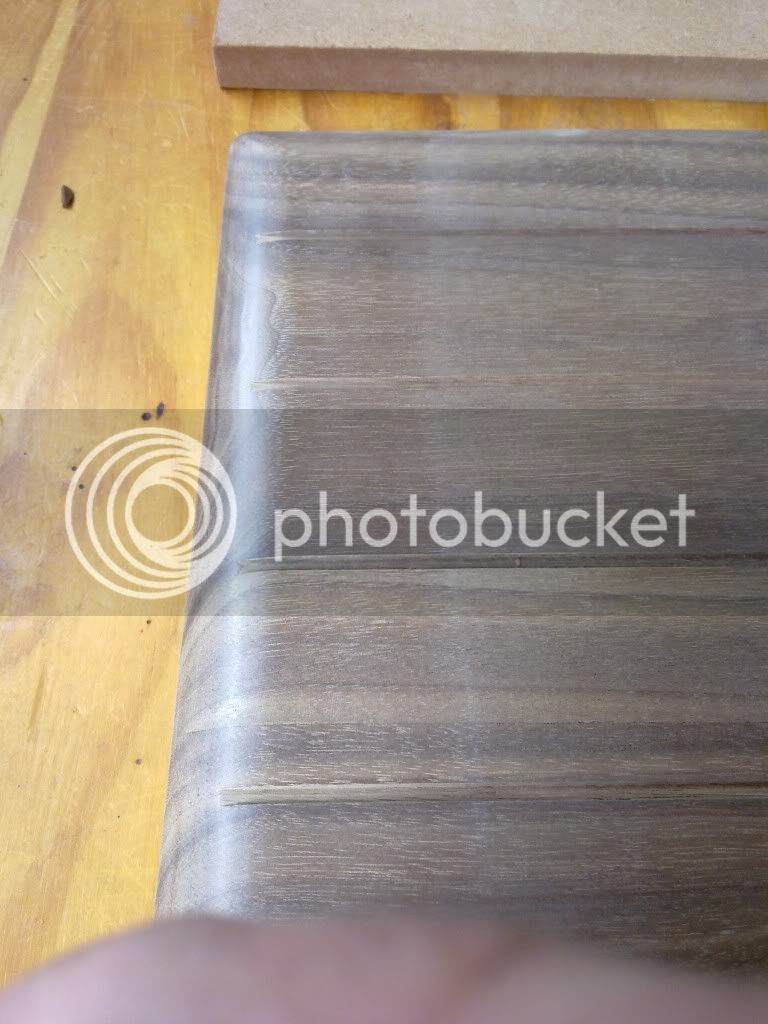
I then cut grooves into the panel - about 1.5mm deep:
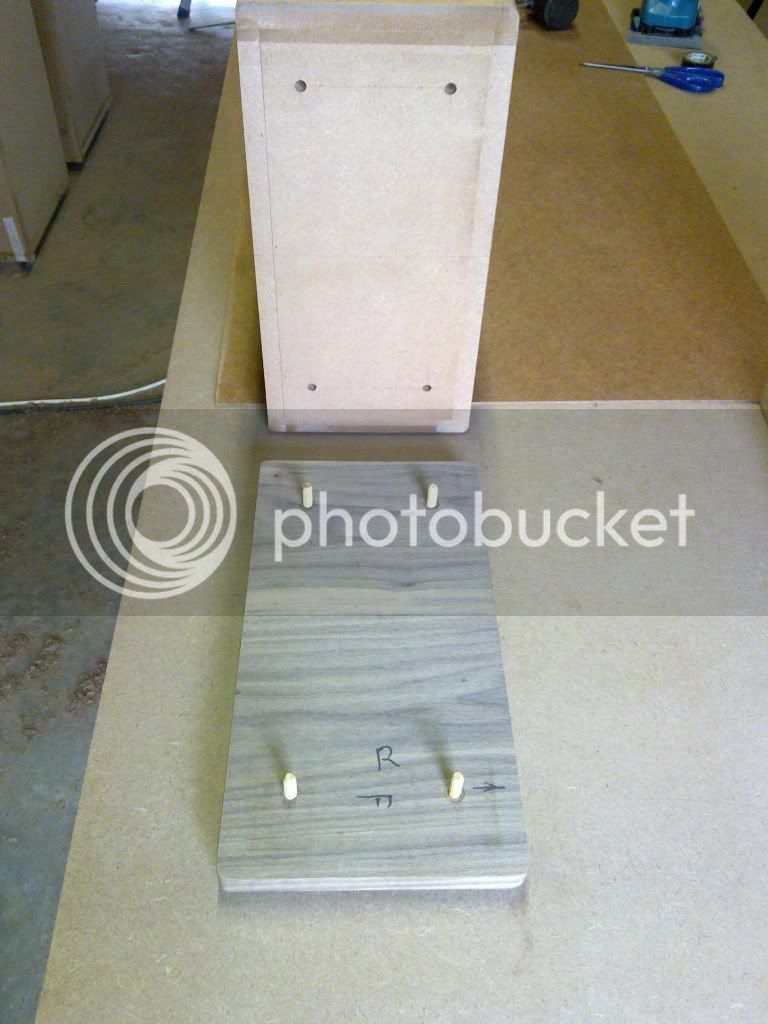
After this I cut the panel in half to form the two side panels. The baffle and back panel have round overs that I needed to transfer to the side panel. The trick to do this is to use dowels that hold the panel in place on the box while I profile it with a flush trim bit:
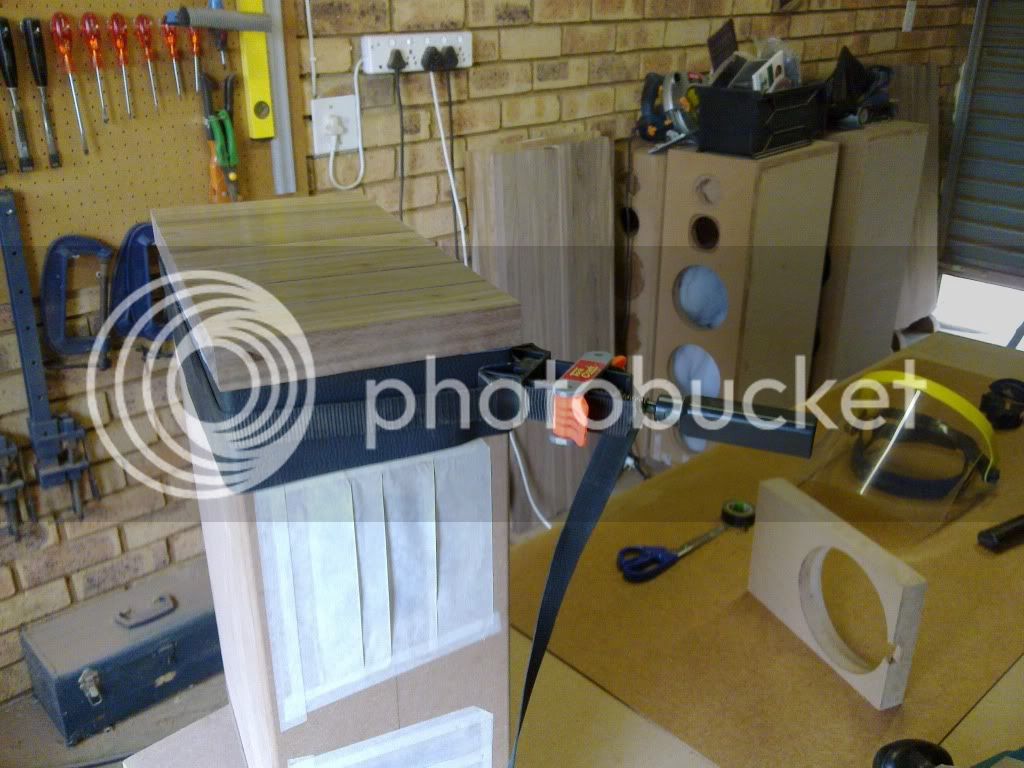
The vinyl I am using has a fluffy backing which makes it about 1mm thick. The vinyl is folded around the box onto the sides (about 15mm) so that when the side panels are glued on they will pinch the vinyl in place (I have routed a +-0.8mm recess for the vinyl so that the side panels will depress it about 0.2mm). I needed to allow for the 1mm thick vinyl when routing the side panels so the vinyl doesn't sit proud of the side panels too much. I could therefore not use the box itself as the template. So I used a strip of vinyl against which the bearing of the router bit runs. I held the strip in place with a belt frame clamp (dunno their proper name) like this:
The side panels got a table edge round over (http://www.toolstoday.com/p-5716-table-edge-router-bits-standard.aspx) without the ridge. After a quick sand with the 80 grit disc on the sander I sprayed water onto the wood so that end fibers in the wood swell up. After it has dried I sand it again.
Here is the what it looks like after the wood has dried prior to sanding:

And after:

As you can see below I get a fairly good shine on the end grain using this technique without any sanding sealer or any other treatment. This is after sanding with 600 grit sand paper in a finishing sander:
Now starts the application of several coats of sanding sealer and finally a couple of coats of Danish oil. I will post pictures of the progress...
The design is based on the Seas CA15RLY (H1216) 5" mid bass driver (x2) partnered with the 27TDFC tweeter. I am using the same tweeter in the fronts and surrounds and the CA15RLY should match the CA11RCY (H149) I am using in the fronts nicely - I hope! I am using a MTM configuration. Here are the specifics:
Box volume: 20l
Tuning: 48Hz
Port dia. 50.8mm (2") length 94.69mm
The box is a run of the mill 16mm MDF (supawood) affair with a 32mm thick baffle. The interesting part of the box - as with the other projects - is the real wood (American walnut) side panels that will be glued to the box. The rest of the box will be covered in black vinyl.
I have glued to 200mm x 500mm x 38mm (W x H x D) wide planks together and sanded the surface down with my drum sander till it was flat. I then gave it a sand with an 80 grit disc on the orbital sander and then with a 240 grit disc. This is the result.
I then cut grooves into the panel - about 1.5mm deep:
After this I cut the panel in half to form the two side panels. The baffle and back panel have round overs that I needed to transfer to the side panel. The trick to do this is to use dowels that hold the panel in place on the box while I profile it with a flush trim bit:
The vinyl I am using has a fluffy backing which makes it about 1mm thick. The vinyl is folded around the box onto the sides (about 15mm) so that when the side panels are glued on they will pinch the vinyl in place (I have routed a +-0.8mm recess for the vinyl so that the side panels will depress it about 0.2mm). I needed to allow for the 1mm thick vinyl when routing the side panels so the vinyl doesn't sit proud of the side panels too much. I could therefore not use the box itself as the template. So I used a strip of vinyl against which the bearing of the router bit runs. I held the strip in place with a belt frame clamp (dunno their proper name) like this:
The side panels got a table edge round over (http://www.toolstoday.com/p-5716-table-edge-router-bits-standard.aspx) without the ridge. After a quick sand with the 80 grit disc on the sander I sprayed water onto the wood so that end fibers in the wood swell up. After it has dried I sand it again.
Here is the what it looks like after the wood has dried prior to sanding:
And after:
As you can see below I get a fairly good shine on the end grain using this technique without any sanding sealer or any other treatment. This is after sanding with 600 grit sand paper in a finishing sander:
Now starts the application of several coats of sanding sealer and finally a couple of coats of Danish oil. I will post pictures of the progress...