For anybody having trouble with a Nad 3020 to adjust bias.
Got a Nad 3020 blowing mains 4A input fuses. Turns out there were a driver on each channel blown. Do not know how that happens ! So I replaced all four. Had 2n6553/2n6556 were the originals and replaced them with BD139/140. The bias setup in the manual reads as if a veteroog/ chinese have written it. So replace the trannies, take out the resistors RX and LX and replace them with Bourns 1K trimpots. Set trimpots to about 700R before installing. Then break the tracks on the pcboard just before the 2n3055 emitters. Solder a 1R half watt resistor across the broken track. The 3020 actually had drilled holes, so it was easy to insert them in the component side of the pcb. Then it is easy to measure the bias, set to 30mV. But put the cover just loosely on without screws to monitor the bias. The setting like this is more accurate because after all, the amp needs a cover and the temperature of the heatsink can be monitored better. Leave for at least 30 min to settle.If bias is good, solder a piece of wire across the place where the emitter tracks were broken, so shorting out the 1R testing resistors. Very easy to set the bias with the trimpots. Adjust DC offset as close as possible to 0mV with the 2 shitty trimpots that was already installed. Put a spot of nailpolish on all trimpots to secure the settings. Remember to put small heatsinks on all drivers, they do run hot !Hope this can help someone struggling to understand the confusing instructions on the service manual.Enjoy a superbbbb amp !
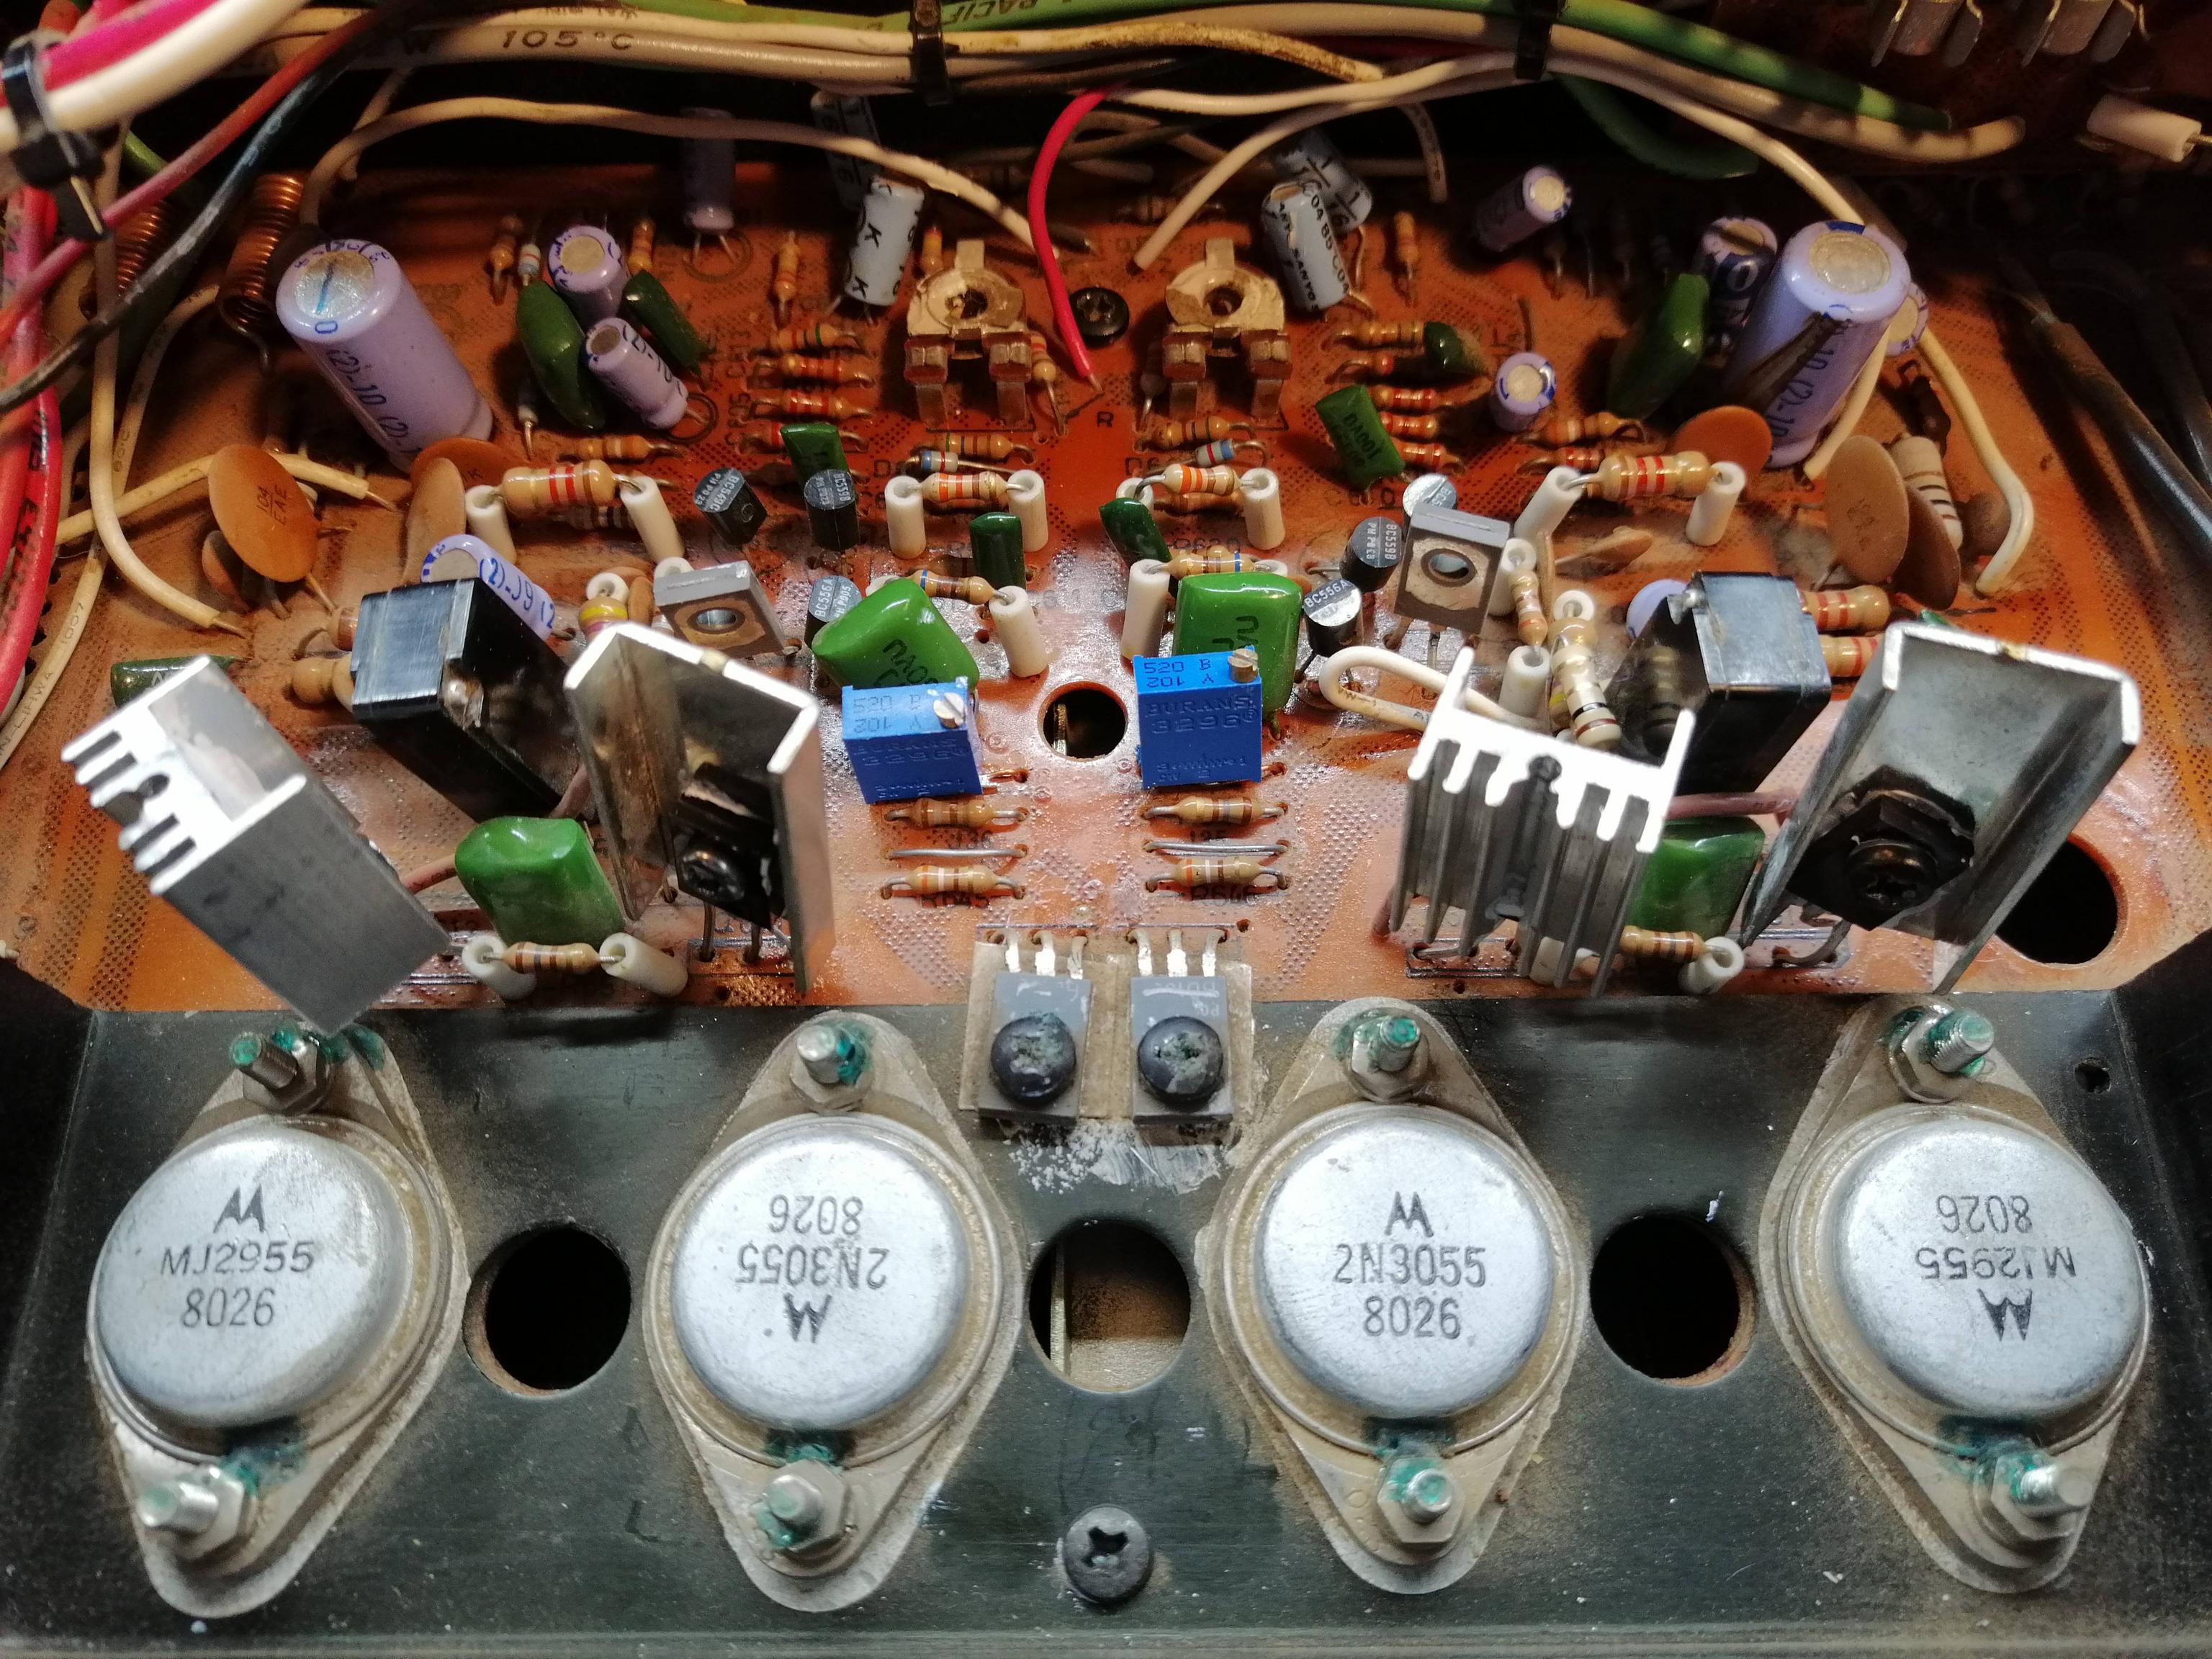
Got a Nad 3020 blowing mains 4A input fuses. Turns out there were a driver on each channel blown.
Do not know how that happens ! So I replaced all four. Had 2n6553/2n6556 were the originals and replaced them with BD139/140. The bias setup in the manual reads as if a veteroog/ chinese have written it. So replace the trannies, take out the resistors RX and LX and replace them with Bourns 1K trimpots. Set trimpots to about 700R before installing. Then break the tracks on the pcboard just before the 2n3055 emitters. Solder a 1R half watt resistor across the broken track. The 3020 actually had drilled holes, so it was easy to insert them in the component side of the pcb. Then it is easy to measure the bias, set to 30mV. But put the cover just loosely on without screws to monitor the bias. The setting like this is more accurate because after all, the amp needs a cover and the temperature of the heatsink can be monitored better. Leave for at least 30 min to settle.If bias is good, solder a piece of wire across the place where the emitter tracks were broken, so shorting out the 1R testing resistors. Very easy to set the bias with the trimpots. Adjust DC offset as close as possible to 0mV with the 2 shitty trimpots that was already installed. Put a spot of nailpolish on all trimpots to secure the settings. Remember to put small heatsinks on all drivers, they do run hot !Hope this can help someone struggling to understand the confusing instructions on the service manual.Enjoy a superbbbb amp !